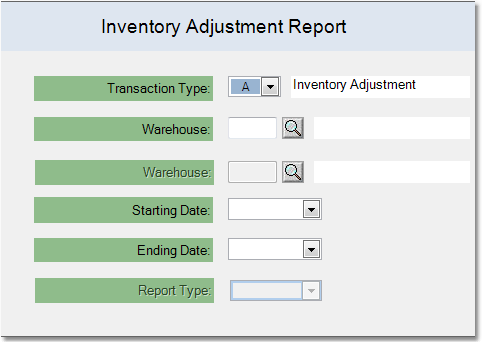
To print an Inventory Adjustment Report follow the easy steps below. As this is a printed report, be sure that your printer is turned on and connected, and that you have inserted a sufficient amount of paper into the correct printer tray before you begin. You can also choose to view the report on screen.
1.Select Inventory > Inventory Adjustment Report.
2.Select "Inventory Adjustment" from the Transaction Type drop down menu. You can also select "All Transactions" to include inventory adjustments, stock transfers and manufactured items.
3.Now select the Warehouse whose inventory adjustments you want to include in the report. Leave this field blank to include all warehouses.
4.Enter the first date of adjustments that you would like to include using the drop down calendar in the Starting Date field.
5.Then, enter the last date of adjustments that you would like to include using the drop down calendar in the Ending Date field.
6.Now, click the OK button in the bottom toolbar. From the printer window, select the appropriate printer and number of copies. You can also view the report on screen before you decide to print it by clicking the View button. Click Print to print the report. This report can also be faxed or emailed by clicking the Fax/Email button. For more help faxing or emailing the report, see the Fax/Email Reports page. |
|
