This section of the system allows you to select groups of products and make changes to all of them at once, rather than going to each individual product account.
First, you must set the selection criteria for the group of products that you would like to make changes to. Then, you need to select the field that you would like to change from a list of options. The system will then present you with a list of products, selected based on your criteria, with their current information for the field that you choose to change. Finally, you may make changes to the field for the products and save the changes.
You can also make mass changes to customers and vendors in their respective sections of the system.
To make mass changes to products follow the easy steps below. This function of the system is best explained through an example. For instance, you may want to switch products from one product line to another. The instructions below will show you how to complete this task in a few easy steps. The same basic steps may be used to make other types of mass changes to products.
1.Starting from the main screen, select File > Product > Mass Change.
2.The Mass Change Product window will pop up so that you may set the selection criteria for the group of products that you would like to change. In this example, we want to select a group of products from one product line. To select this group, enter the product line in the Prod Line box and press Tab, or use the ![]() to search for the correct code. Then, click the OK button in the bottom right corner of the window.
to search for the correct code. Then, click the OK button in the bottom right corner of the window.
3.The Mass Change Fields window will pop up so that you may select the field to change. Click once on the field in the window and then click the Select button. You may only select one field to change at a time.

4.Once you have selected the appropriate field, the Mass Change Product screen will open. This screen will display a list of the first 20 selected products with their current value for the selected field. Click any field in the example below for more information.

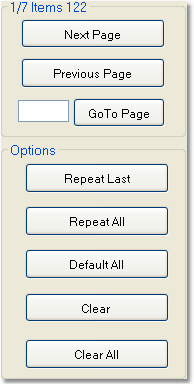
To the right, you will see a navigation box that will display the number of the page you are currently viewing (page 1 of 7 in this example), as well as the total number of products that have been selected based on your criteria (122 in this example).You may use these buttons to move from one page to another, as well as to jump to a specific page number. Click on any button to the right to learn more about its function.
Below this box you will see the Options box. These buttons can be used to make your mass change more efficiently. Click on any button to the right to learn more about its function.
Now let's make our change. We want to switch all products assigned to the BP-CHEM product line to a different product line, 99-CHEM. Click in the New Value field for the first product on the list. Enter the Product Line code for the new product line, or use the
If you are assigning all of the products to the same product line, you may use the Repeat All button to expedite the process. To use this feature, click the Repeat All button after making your first change. This will assign the same new value to all products in the group listed after the selected product.
Note: When making mass changes, you may also inquire about any product by clicking the Inquire button in the bottom toolbar. This will display the Product Master screen for the product. |
|
5.Once you have completed your mass changes, click the Save button in the bottom toolbar to save the changes to the system. All products will reflect the change immediately.
![]()
