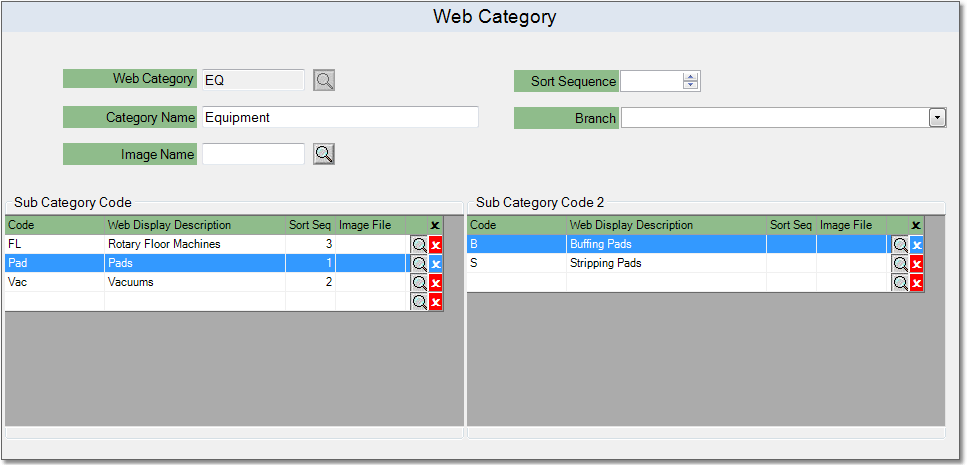
To create a Web Category follow the easy steps below. These web categories will only be used for products that are published in your online catalog and will not affect your other products. You can always come back to add or remove sub categories and change description information.
1.Select File > Product > Web Category.
2.Click the New button in the bottom toolbar.
3.In the Web Category field, enter a reference code for the category and press Tab. If an entry already exists for this code, it will display the relevant category information. Remove the code from the field and click New to create a different code. This code can be alphanumeric.
4.Enter the name of the category such as "Cleaning Chemicals" in the Category Name field. This name is exactly what will display on your e-commerce site, so be sure that your spelling and capitalization are exactly as you want your customers to see them.
5.Enter a Sort Sequence number to control the order of the categories when they display online. If you leave this field blank, the categories will display in alphabetical order by Category Name.
6.Now you can create any Sub Categories that you need in the Sub Category section; click in the Sub Category field and enter a brief code for the sub category. Press Tab to bring you to the description field, then enter a description for the sub category and press Tab. This will create another blank sub category entry below the first.
To clear a sub category, click the red ![]() button to the right of its description. This will remove the row.
button to the right of its description. This will remove the row.
7.To create level 2 sub categories for your sub categories, first click on the sub category. In the Sub Category 2 section to the right you will see a blank row. Enter a reference code in the Sub Category 2 field and a description in the Description field, then press Tab.
To enter level 2 sub categories for a different sub category, click on the name of the sub category in the Sub Category section. You can switch between categories before saving and they will retain the level 2 sub categories that you create.
8.When you have entered all of the necessary information, click the Save button in the bottom toolbar. An example of a completed entry is shown below. Click on any field shown for more information.
