Before printing your check, be sure that you have the correct amount of check paper inserted into the proper tray of the designated printer. Also note that this is for printing individual checks to pay vendor invoices. If you would like to print a check for a non vendor, see the Non Vendor Check page.
1.Select Accounting > Accounts Payable > Check Print.
2.Click the Edit button in the bottom right corner of the screen.
3.Click the Options button in the bottom left corner of the screen.
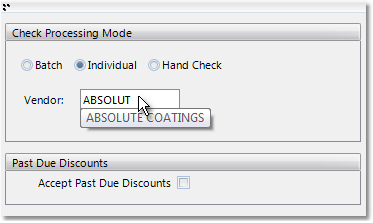
4.Select the Individual option.
5.Enter the Vendor in the Vendor field (shown below). The display window to the right will display only this vendor.

6.Right-click on the vendor name in the window to the right and select "Expand" from the menu. This will display all open invoices for the vendor.
7.Checking off the box to the left of the Pay To Vendor field will display the full open balance of the invoice as the Pay Amount. If there is a discount available, the discount will be applied based on the Discount Date for the invoice. The batch can be defaulted to accept all discounts, even if it is past the discount date, by clicking on the Options button in the lower left corner and checking the Accept Past Due Discounts box. The Pay Amount can be adjusted by clicking on the amount in the field and entering a new amount to pay.
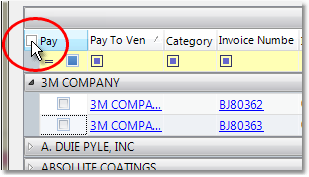
All invoices for the vendor can be selected at once by checking the box to the right of the Pay column heading (shown below).

8.Once you have selected the invoices, click the Print button in the lower right corner of the window. Select the appropriate printer from the drop down menu and click the Print button to print the checks.