To enter a tax credit follow the easy steps below.
1.Starting from the main screen, select Sales > Order > Sales Order. You can also click on the Sales Order icon ![]() in the toolbar.
in the toolbar.
2.Enter the customer's name, reference number, city, or A/R phone number in the Customer field and press Tab, to search for the correct customer.

3.Under the Header tab, enter a Customer P/O (if necessary) and select a Ship Via that will not place the order on a truck. (Use a "Pick-Up" or "Do Not Ship" Ship Via to avoid confusion in Truck Scheduling). Under the Other tab, verify that the Tax Code is the same as the one that was used on the invoice you are issuing the credit for. This tax code will be used to calculate the amount of the credit.
4.Click on the Detail tab. In the empty Product field, right-click and select Issue Tax Credit or Debit from the menu.
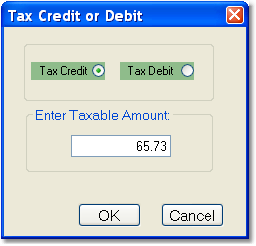
5.The "Tax Credit or Debit" window will pop up. Select the Tax Credit option, then enter the merchandise amount that the customer was charged tax on in the Enter Taxable Amount field. You may need to find the original invoice to look up this amount. Then click the OK button.
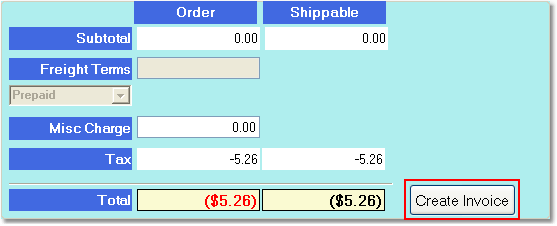
6.You will see two entries appear under the Detail tab. Click on the Final tab to see the actual amount of the tax credit. Verify that this matches the tax amount on the invoice. Then, click the Save button in the bottom toolbar.
7.The tax credit will not post to the customer's account until it is invoiced. To place the credit in billing to be invoiced, click the Create Invoice button to the right of the order totals. This will place the order in the invoicing batch to be invoiced. Once it is invoiced, you can apply it to the original invoice in the Cash Receipts screen, by checking off both the invoice and the credit.
