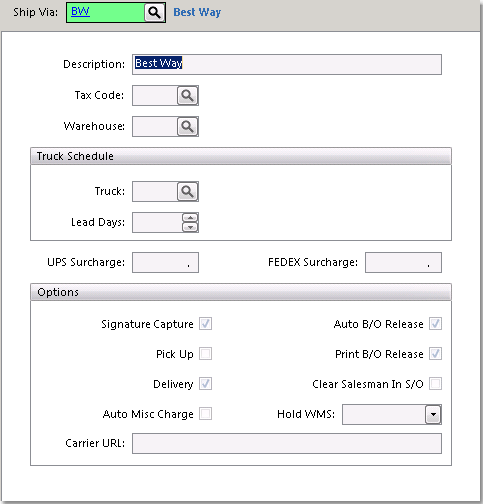
To create a Ship Via
Once the ship via has been created, you can use it on Sales and Purchase Orders, and set it as a default in the Customer and Vendor Master screens.
|
1.Select File > Company > Ship Via.
2.Click the New button in the bottom toolbar.
3.Enter the reference code for the ship via in the Ship Via Code field and press Tab. If the reference code is already assigned to a ship via, the system will display information for that ship via.
4.Enter a brief description of the shipping method in the Description field. The description will print on the customer's shipping document and invoice. This is all of the information required to save the ship via. Click on any field in the example to the left for more information.
5.When you have entered all of the information, click the Save button in the bottom toolbar to save the ship via.
Note: If you are using UPS Worldship and wish to accommodate flat rates, you can go into UPS Worldship Options and select "Flat Rate" for a handling charge. |
For companies using Wireless Warehouse:
 You will see an additional drop down menu (shown to the left) to choose when orders marked with this Ship Via will display in the Job Queue on your wireless guns.
Individual S/O - Sales Orders will display in the Job Queue immediately after they are saved in Inform.
Truck - Orders will display in the Job Queue when the truck is sent to the wireless guns from the Truck Manifest. Orders will not appear before the truck is sent.
Exclude - Orders will never appear in the Job Queue. They can be picked on the guns by entering the order number or scanning the barcode on the printed Sales Order.
