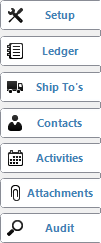
The Customer Master screen can be accessed by clicking on the Customer icon in the toolbar, or by clicking on File > Customer > Master. Once you have selected a customer account to view, the tabs shown to the left will appear. These tabs contain information pertaining to the customer's default account settings, accounts receivable status, contact information, and calendar activities. Click on any of the tabs to the left for information regarding a specific section of the Customer Master screen.
To view information pertaining to an individual customer, start typing part of the customer's number, name, city, state, or A/R phone number into the Customer field in the upper left corner of the window. The system will search as you type and display a list of relevant results in a drop down menu. Click on the hyperlinked Record ID to select the appropriate customer account.
The customer's overall Credit Status is displayed in the upper right corner as a drop down menu. See the Setup tab > Credit tab for more credit information.
Permission to view and edit customer information, is controlled by user Access Levels. See the Access Levels page for more information.
Create and Run Custom Reports
Use the Report button in the bottom left corner of the Customer Master window to run custom reports on your customer accounts. These reports can be printed, faxed, emailed, viewed on screen, or exported to Excel. For more information and instructions, see the Customer Reports page.
Print Customer Mailing Labels
Use the Labels button in the bottom left corner of the Customer Master window to print mailing address information on label paper. Labels can be printed from a compatible laser printer on label paper purchased from an office supply store. For more information and instructions, see the Customer Labels page.