The Balance Sheet provides a snapshot of your company's standing with regards to assets, liability and equity. When reviewing a Balance Sheet, your total assets must equal the sum of the total liability and total equity. Also, your net income on your Balance Sheet should match the net income on your Income Statement and Trial Balance.
When you print your Balance Sheet, you should also print a Trial Balance and Income Statement so that you can verify that your numbers match. For more information on comparing your reports, see the Matching Your Reports page.
To print a Balance Sheet follow the easy steps below. Once you have printed the report, you should match it to your Trial Balance and Income Statement reports to verify that the totals are correct. For more information, see the Matching Your Reports page.
1.Select Accounting > General Ledger > General Ledger Inquiry.
2.Click on the Financial Reports tab. Click on the ![]() to the right of the Report field and select "Balance Sheet" from the menu.
to the right of the Report field and select "Balance Sheet" from the menu.
3.Under the Report tab, enter the desired calendar period for the report in the Calendar Period field and press Tab. The system will automatically enter the corresponding fiscal period. You can also choose to enter the appropriate fiscal period in the Fiscal Period field and press Tab. The system will then enter the corresponding calendar period.
4.To the right, you can choose to only print the report for a specific G/L suffix by checking off the suffix that should be included.
5.Choose to print a Summary or Detail report from the Summary/Detail drop down menu. If you choose to print a detail report, you can also choose to show the individual General Ledger accounts by checking the Show G/L Account box.
6.Finally, click the OK button. This will create an Exceptions tab and a tab with the name of the report that you are running. The Exceptions tab displays any ungrouped General Ledger accounts. Click on the account number hyperlink to open the G/L Account screen and link the account. You can then re-run the report.
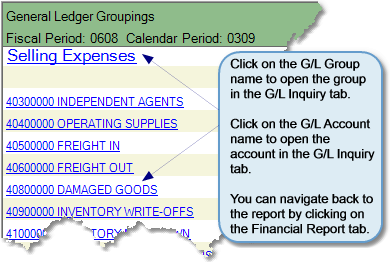
To view the report, click on the tab with the name of the report. Click on any of the hyperlinked groups or accounts to view transaction details under the G/L Inquiry tab in the top right corner of the screen. You can return to the report by clicking on the Financial Reports tab at the top of the screen.

To print the report, click on the Report button. From the printer window, select the appropriate printer and number of copies. You may also view the report on screen before you decide to print it by clicking the View button. This will open a preview of the report in a new window. Click Print to print the report. Remember to check that your printer is turned on and connected, and that you have inserted a sufficient amount of paper into the correct printer tray. You may also fax or email this report by clicking the Fax/Email button. For more help faxing or emailing the report, see the Fax/Email Reports page.
To export the report, click on the Export button. Name the file and choose a location to save it, then click the Save button.
If there are accounts listed under your Exceptions tab your report figures may not match your Trial Balance. This tab identifies accounts that are not linked to G/L Groups. Assign any accounts listed under this tab to the appropriate G/L Group(s) through the G/L Account screen.