You have just scheduled your checks and reviewed the Scheduled Checks Report. There are invoices on the report that you don't want to print checks for, so you would like to remove them from this current batch to pay at a later time.
To remove a check from the batch follow the easy steps below. You can print a check for the invoice(s) at a later time, or add the vendor to the batch again.
1.Select Accounting > Accounts Payable > Check Print.
2. Enter the reference code for the vendor whose invoice you want to remove from the batch in the Vendor field and press Tab.
3. The vendor will display with an "In Batch File" flag to the right of their number, and all of the invoices that will be paid by the check in the window below. |
|
4. If the vendor has multiple invoices in this batch, uncheck the ones that you do not want to pay and then click the Save button. You will not see the number of scheduled checks change, because the system is still printing a check for the vendor's other invoices.

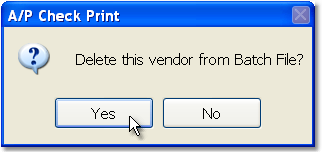
If the vendor only has one invoice to be paid or if you would like to remove all of the invoices for this vendor from the batch, click the Delete button in the bottom toolbar. A window will pop up asking if you are sure that you want to delete this vendor from the batch file. Click the Yes button in this window. You will see the number of scheduled checks adjust.

If you need to add additional invoices to the check for the vendor, you must first delete the vendor from the batch (as explained above). Once the vendor has been deleted, enter the name of the vendor in the Vendor field and press Tab. This will display all of the vendor's open invoices. Check off the invoices that you want to pay, then click the Save button to add these invoices to the batch. You will see the number of scheduled checks adjust to reflect this addition.
5. Now you can print the batch by clicking the Print Batch button. In the printer window, select the correct printer and be sure that it is loaded with check paper. Then click the Print button. A window will pop up asking if the checks printed correctly. If they did, click the Yes button. If they did not, click the No button. The system will give you the opportunity to print the checks again.
![]()
