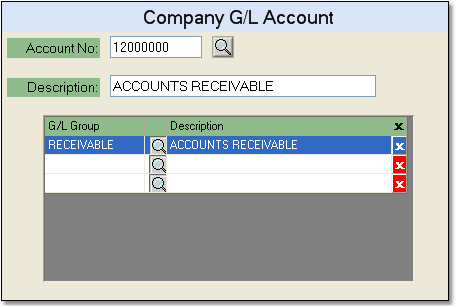
To create a G/L Account follow the easy steps below. Once the account is created, you can assign transactions to post to it using the G/L Control Table.
When creating a G/L account, the Account number is very important. The number of the account determines the type of account and controls where it appears on your Balance Sheet and Income Statement. It also determines if the account balance will be carried over at the end of the year (on the Balance Sheet) or cleared out (on the Income Statement).
The table below displays a widely accepted numbering scheme for your General Ledger accounts. Your accounts may follow a different numbering scheme. However, all accounts numbered less than the P & L Break Account must belong to the Balance Sheet and all accounts numbered greater than the P & L Break Account must belong to the Income Statement.
Account # Begins with... |
Account Type |
Example |
Used on |
1 |
Asset |
A/R Cash Account |
Balance Sheet |
2 |
Liability |
Accounts Payable |
Balance Sheet |
3 |
Equity |
Retained Earnings |
Balance Sheet |
4 |
Revenue |
Sales |
Income Statement |
4 or 5 |
Overhead Expenses |
Handling |
Income Statement |
4 or 5 |
Cost of Sales |
Cost of Goods Sold |
Income Statement |
6 |
Miscellaneous |
A/P Discount |
Income Statement |
1.Select Accounting > General Ledger > G/L Account.
2.Click the New button in the bottom toolbar.
3.Enter the reference code for the new account in the Account No. field and press Tab. This reference code must be numeric and cannot include any letters or symbols. If there is already an account assigned to that code, the system will display information for that account. If not, a "New Record" flag will appear to the right of the field.
4.Enter a title or brief description for the account in the Description field.
5.Then, assign the account to a G/L Group by entering the reference code for the group in the G/L Group field and press Tab. General Ledger accounts must be linked to a G/L Group or they will not be reflected in your financial reports.
6.Once you have entered all of the necessary information, click the Save button in the bottom toolbar. This will save the account to the system. |
|
