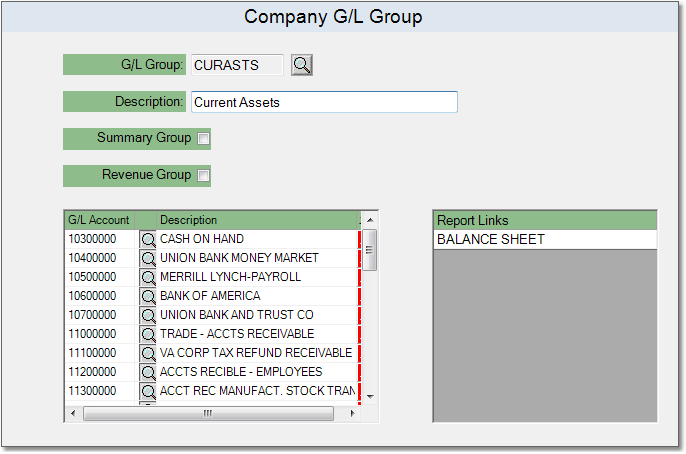
G/L Groups are used in Financial Reports. Each G/L Account must be assigned to a G/L Group, or your Balance Sheet and Income Statement will not be correct.
Additionally, for your Balance Sheet, you should have a group called "Income Summary" or "Income Statement" that includes all of the G/L Accounts on your Income Statement. Income Statement accounts are any accounts with a G/L number that is greater than the G/L number of the P&L Break Account.
If you have a multi-branch setup and are using G/L Suffixes, you will need to create additional G/L Groups for each branch, then use these groups to create separate Income Statement reports.
To create a G/L Group follow the easy steps below. You can assign G/L accounts to the group when you create it, or you can go back and add accounts later by editing the group.
1.Starting from the main screen, select Accounting > General Ledger > G/L Group.
2.Click the New button in the bottom toolbar.
3.Enter a reference code for the group in the G/L Group field and press Tab. If a group already exists for the reference code, the system will display information for that group. If not, a "New Record" flag will appear to the right of the field.
4.Enter a title or brief description of the group in the Description field.
5.Now, in the window on the left, add G/L accounts to the group. Enter the reference number for the account in the G/L Account field and press Tab, or use the ![]() to search for the correct account. The Report Links section cannot be edited from this screen. To add this group to a report, use the Financial Reports screen.
to search for the correct account. The Report Links section cannot be edited from this screen. To add this group to a report, use the Financial Reports screen.
6.When you have finished entering all of the necessary information, click the Save button in the bottom toolbar. This will save the group to the system. You can now use the group in reports through the Financial Reports screen. Click on any field in the example below for more information.
