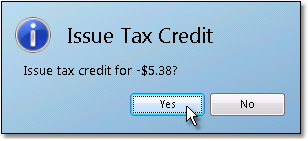
If a customer was mistakenly charged tax on an invoice that they are paying, you can issue them a tax credit and receive their payment from the Cash Receipts screen. A separate, negative invoice will be created in the amount of the tax charged on the selected invoice. You can then immediately apply the tax credit to the invoice and receive your customer's payment.
These instructions only apply if you are crediting the customer for the entire amount of tax on the invoice.If you are issuing a credit for a portion of the tax amount, you need to issue the credit using the Sales Order screen. See instructions here.
Issue a Tax Credit
The system will automatically calculate the total tax amount on the invoice and create a separate, negative invoice for it.
1.Select Accounting > Accounts Receivable > Cash Receipts.
2.Enter the Customer Number or Customer Name in the Account field to search for the correct account. You can also click on the Find button to search by Invoice Amount (shown below), Invoice Number, or Customer P/O.

3.Enter the payment information in the Check area in the upper right corner of the screen. (Note: If you are posting a Credit Card Payment, see the Post a Credit Card Payment instructions).
-The G/L Bank Code will default to your account that will accept the deposit. Changing the Bank Code will start a separate batch for that account. You can build multiple Cash Receipts batches at once and then post them individually. The current balance in that account, as reflected in Inform, will display in the Balances section to the right.
-The Posting Date will default to the current date. Changing this date will only reflect in the Bank Ledger and Bank Reconciliation screens. It will not affect the date displayed in the General Ledger.
-Select the payment method from the Payment Type drop down menu. If you are accepting a check, enter the Check Number for the check. The system will not allow you to enter duplicate check numbers for the same customer.
-Enter the amount of payment received in the Amount field and press Tab.
4.Right-click on the invoice that you would like to issue a tax credit for and select "Issue Tax Credit" from the menu. This option will not be available if there was no tax charged on the invoice. A window will pop up asking if you want to issue a tax credit for the negative tax amount that is on the invoice. Click the OK button. A tax credit will be created for the invoice, under the current date.

5.To apply the credit to the invoice, check off both the invoice and the credit, which will be listed under the current date, usually at the bottom of the list of invoices. Check off any other invoices that the check should be applied to, then click the Save button in the bottom toolbar to save the posting. You can also click the Print Receipt button before clicking the Save button to print a receipt for the customer.

6.Once you have entered all of your payments for the batch, click the Print & Post To A/R button to print the Cash Receipts Audit Trail and post and update your Cash Receipts in Accounts Receivable.