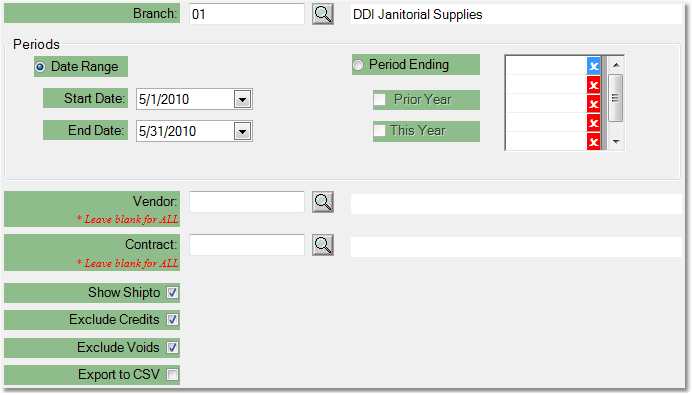
The Vendor Rebate Report allows you to print or export contract sales and rebates due. You can choose to focus the report based on a date range, vendor, or individual contract. The report provides contract, customer, and invoice information, and can be exported to a spreadsheet for more flexibility.
Situations when an invoice/item will not appear on the rebate report:
•When the cost and/or price of the contract item is changed on the invoice. If you need to change the contract cost/price, make the change in the Price Contracts screen before entering the order.
•If the last purchase cost for the product is lower than your rebate cost. If you purchased the item at a lower cost than your rebate cost, the item will not appear on the rebate report because the rebate amount would be negative.
•If the item was added to the contract after the order was entered. Making changes to a contract after an order has been entered will not apply those changes to the order. If you need these changes to apply retroactively, you can re-index your vendor rebates for a specific contract and a specific period. See the Re-index Vendor Rebates page for more information.
To view the Vendor Rebate Report follow the easy steps below. You can also export the report as a .csv spreadsheet if you need to adjust the formatting for your vendor.
1.Select Sales > Vendor Rebates > Vendor Cost Contract Rebates > Vendor Rebate Report.
2.Your branch will automatically default to display in the Branch field. You can leave this field blank to include all branches in the report.
3.Choose to run the report for a Date Range or Period Ending. Enter a Starting Date and Ending Date date, or a period. Only invoices posted during this period will be included in the report.
4.You can also choose to select a specific vendor or contract to be included in the report. Choose to hide or display Ship To information for the invoices, and to include or exclude credits on the report. Click on any field in the example below for more information.

5.Export the report to a spreadsheet by checking the Export to CSV box. If you want to print, fax or email the report leave this box unchecked.
6.Click the OK button in the bottom toolbar. The printer window will pop-up. From the printer window, select the appropriate printer and number of copies. You may also preview the report before you decide to print it by clicking the View button. This will open a preview of the report in a new window. Click Print to print the report. Remember to check that your printer is turned on and connected, and that you have inserted a sufficient amount of paper into the correct printer tray. You may also fax or email this report by clicking the Fax/Email button. For more help faxing or emailing the report, see the Fax/Email Reports page.
![]()