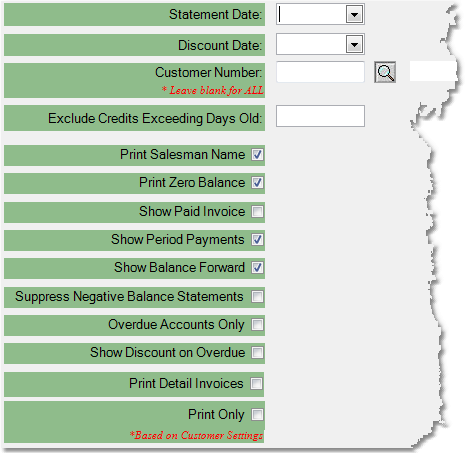
Customer Statements display your customer's open invoice balance as of a given date. If you use Finance Charges, statements should be printed after you have updated your finance charges. Settings in the Customer Master will affect how the statement prints for the customer, as well as whether it is printed, faxed or emailed.
The type of statement that prints for the customer is controlled in the Customer Master, under the Credit tab. The "Statement" section in the bottom right corner allows you to choose from the following options:
•Regular Statement - displays the individual invoices with current balances
•Balance Forward - displays the total open balance on the customer's account
•Do Not Print Statement - never prints a statement for the customer
Additionally, customers can choose to have their statements sent to them via fax or email. This can be set in the Customer Master, under the General tab. The "Send Options" section in the top right corner of the screen allows you to set the default sending method for Statements. If you choose Fax or Email, the system will send the statement to the default Accounting contact for the company.
To print Customer Statements follow the easy steps below. Click on any field in the screen image shown for more information on specific fields.
1.Select Accounting > Accounts Receivable > Customer Statements.
2.Select the Statement Date. This will be the cutoff date for included transactions. Any payments received after this date will not be reflected.

3.The system will automatically enter the Discount Date as the next month's date on which customer payments are due to receive a discount. You can also change this date manually.
4.If you would like to print a statement for a specific customer enter the Customer Number and press Tab, or use the ![]() to search for the correct customer number. Leave the field blank to include all customers.
to search for the correct customer number. Leave the field blank to include all customers.
5.You can also enter more specific selection criteria for the customers included in your statements by clicking the Selection Criteria button in the lower right corner of the screen. The Selection Criteria window will pop up, allowing you to enter criteria regarding which customer statements will be printed. Once you have entered your information, click the OK button in the bottom right corner of this window and you will be returned to the Customer Statements screen to finish customizing and printing your statements.
6.Select the other information you want to include in your statements by clicking the box next to the option. A ![]() indicates that the option has been selected.
indicates that the option has been selected.
7.When you have completed the necessary information, click the OK button button in the lower right corner. From the printer window, select the appropriate printer and number of copies. You may also preview the report before you decide to print it by clicking the View button. This will open a preview of the report in a new window. Click Print to print the statements. If you check off the Print Only option, all statements will be printed regardless of the customer's setting.
If you are faxing or emailing statements for customers, you can click the Sent Results button in the bottom toolbar to verify that your faxes and emails went through. This report can be printed or viewed on screen.
![]()